Gravity Forms VacationCRM Integration
Recently we published a new WordPress plugin that integrates Gravity Forms with our friends at VacationCRM. Currently, the plugin can be purchased on our plugins page if you don’t already have it. Below are some of the basic instructions to get you setup and connected with VacationCRM.
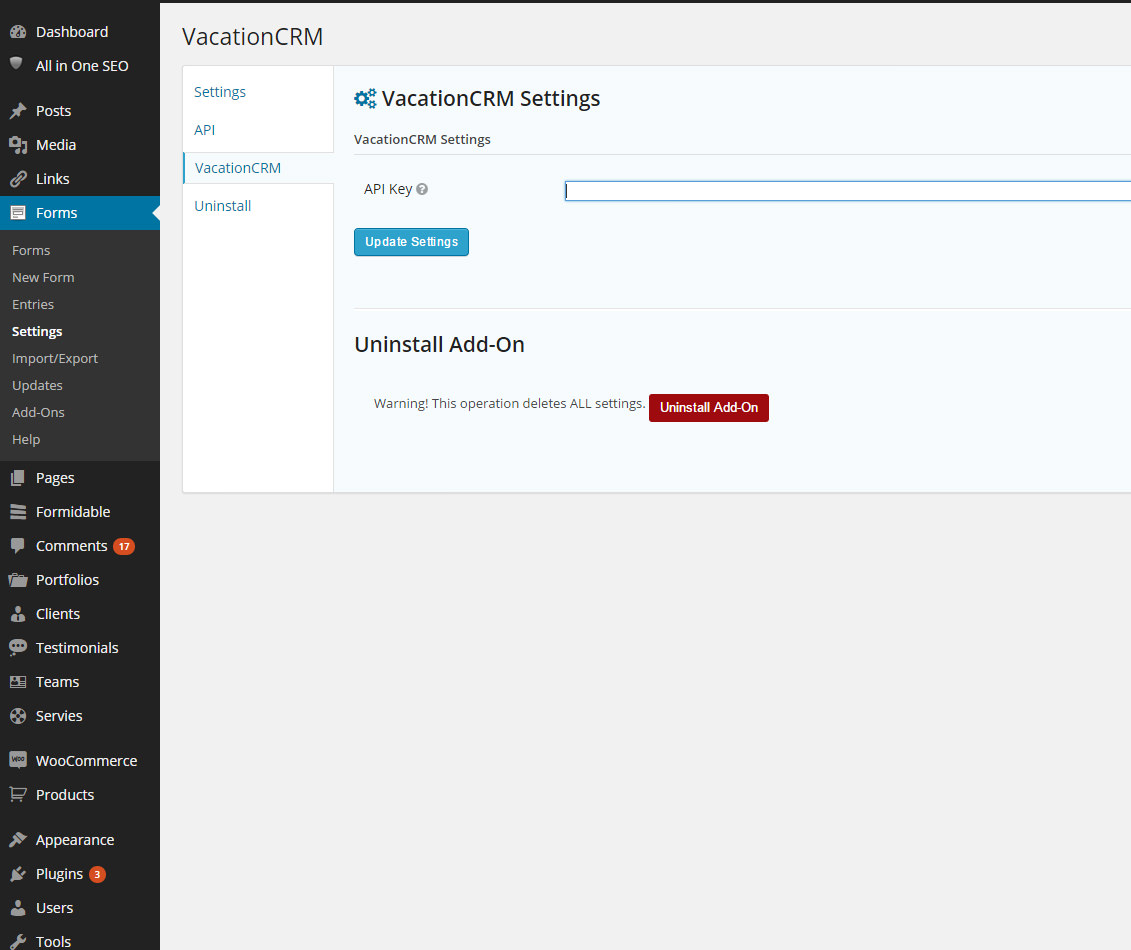
After you install and activate the plugin, go to the Gravity Forms management section in your WordPress site by going to the Forms menu item and then clicking on Settings. From there, you’ll need to click on the VacationCRM tab and add in your API Key. Then click Update Settings.
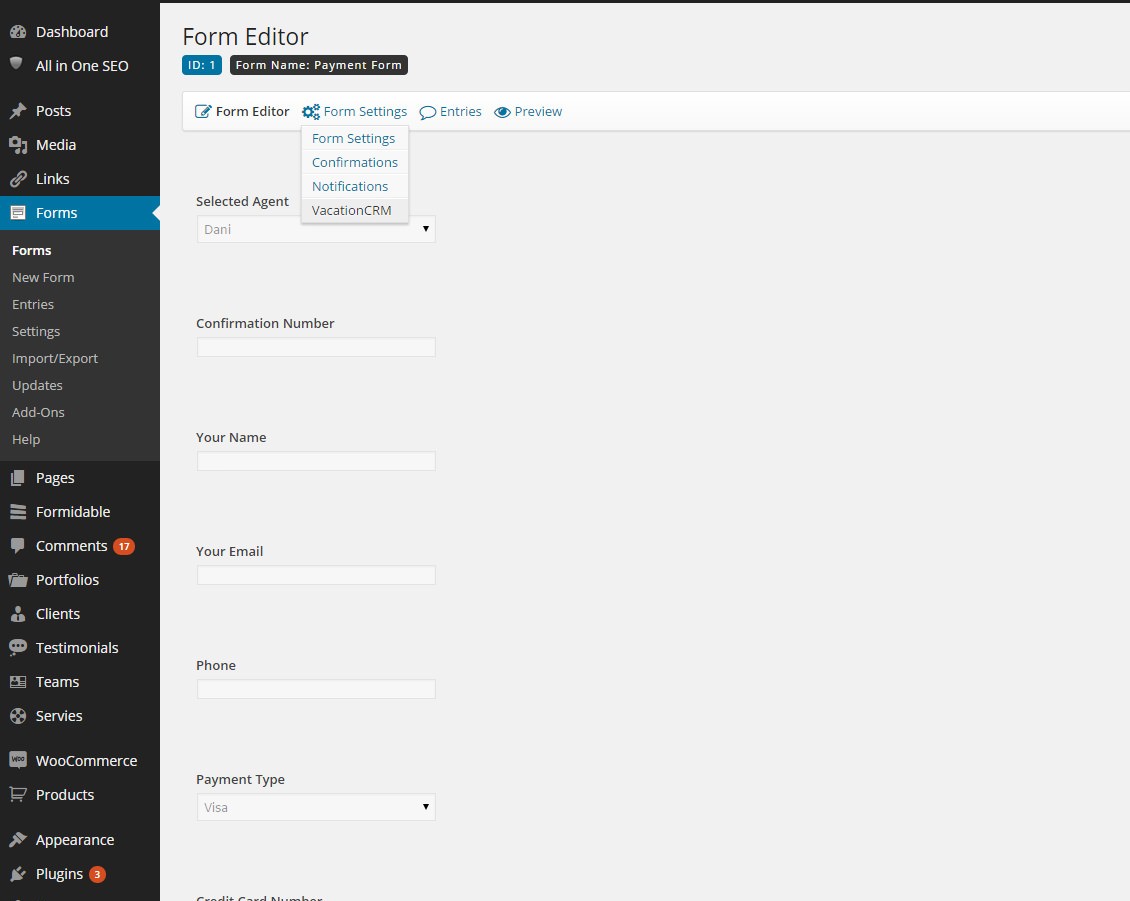
Next, you’ll want to navigate to the forms that you’ve built. Please note, this plugin will not build the forms for you. It will connect your existing forms to VacationCRM. Go to the Forms menu item and then click on Forms. Then you’ll want to hover over the Form Settings option in the header until the drop down appears and then click on VacationCRM.
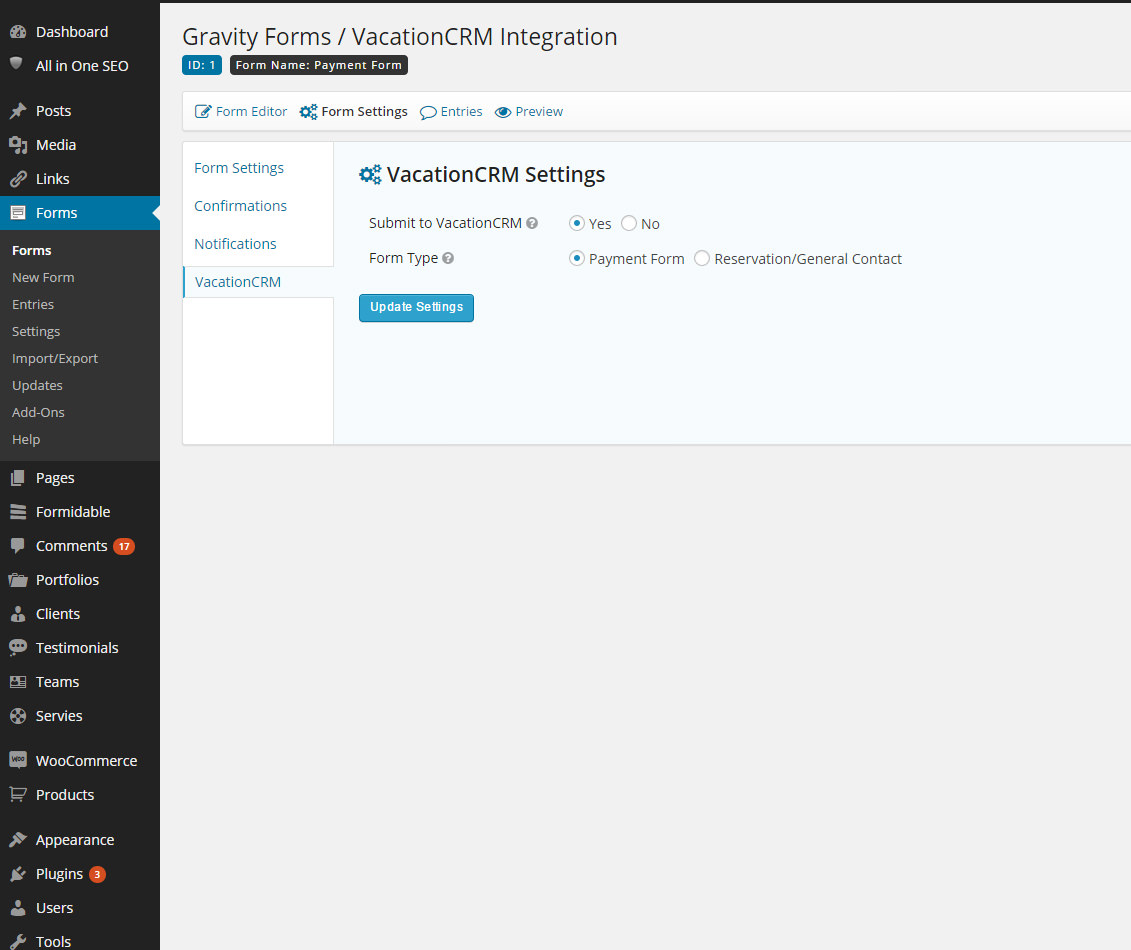
Specify the type of form that you’re submitting and whether or not you want the form data to be send to VacationCRM. Then click the Update Settings button.
Then, click on the Form Editor tab to open the form that you’ve built. For each field that you want to send to VacationCRM, click on the field and then click on the Advanced tab.
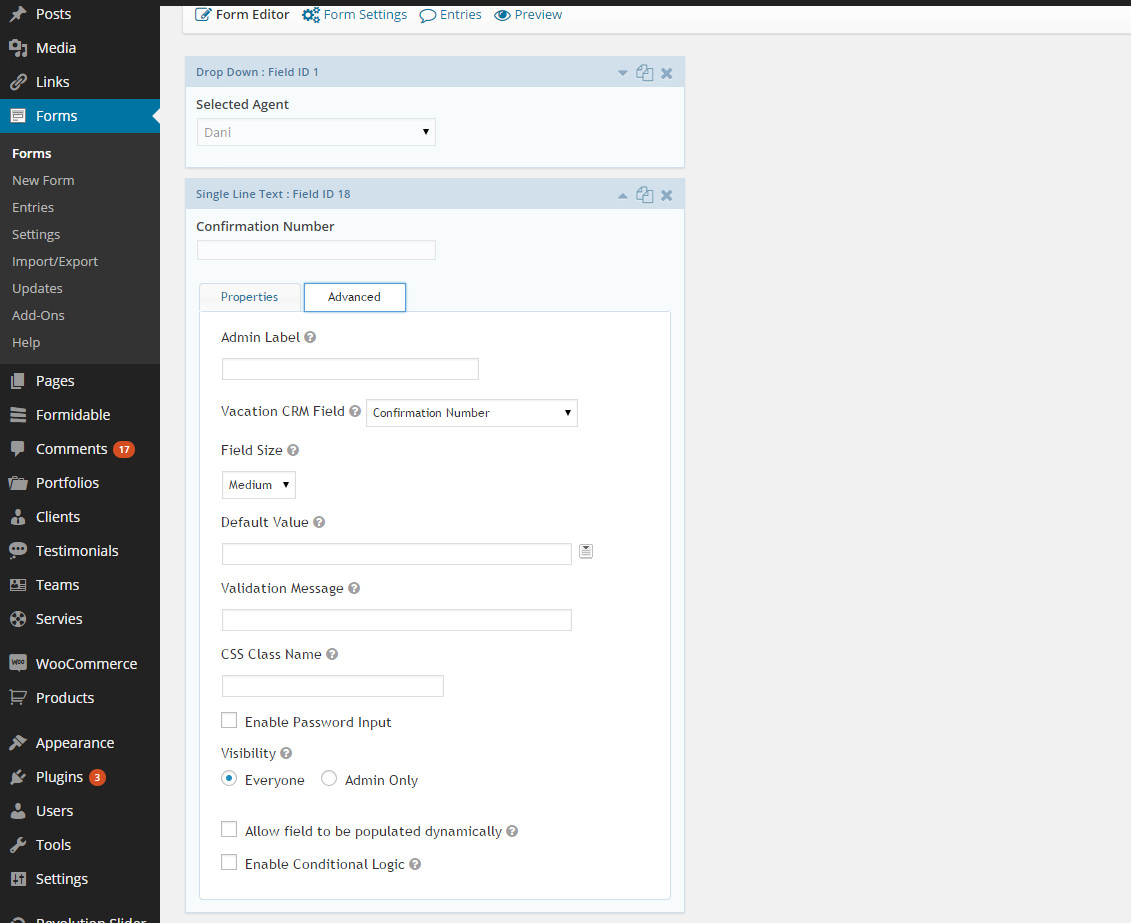
In the VacationCRM Field drop down, choose the API field that you want the data to be mapped to.
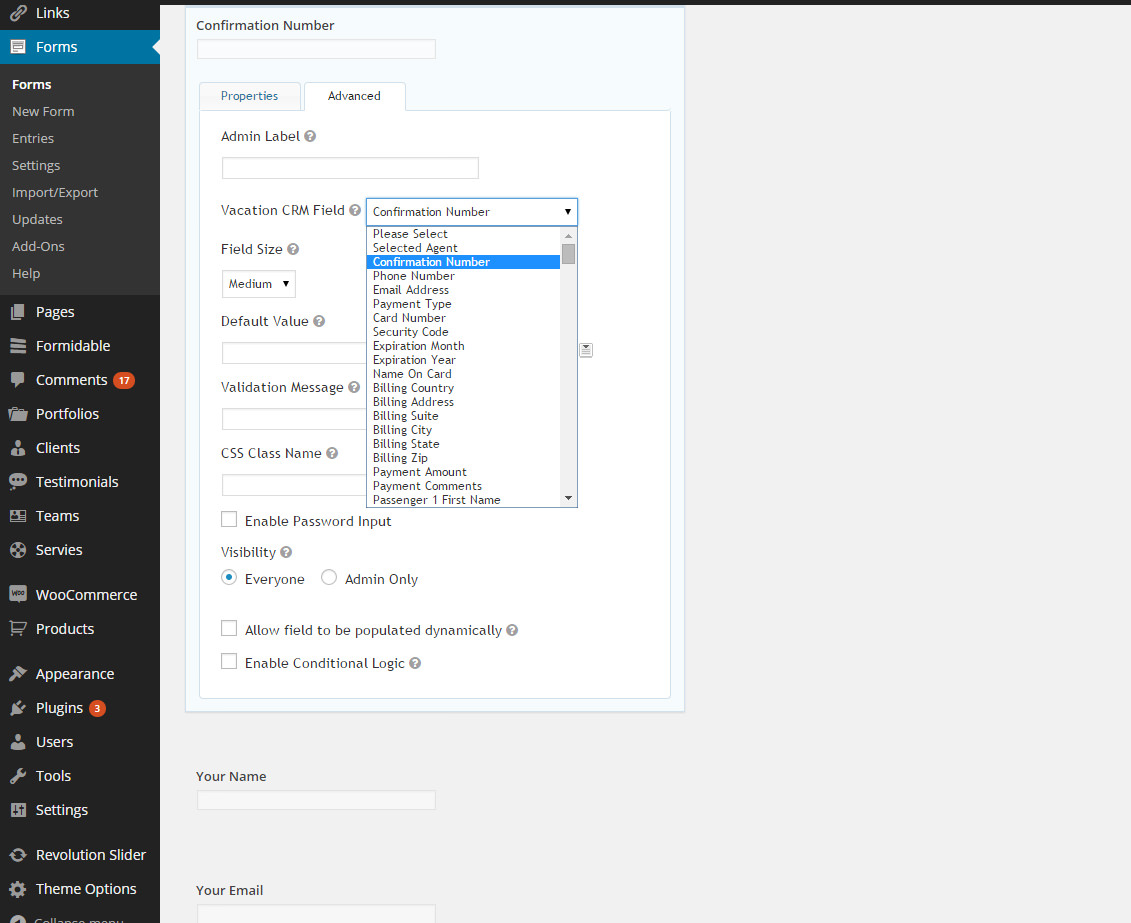
Do this for all the fields on your form and when complete, make sure to save the form by clicking the blue Update Form button on the right hand side of the page.
After you’re done, the plugin handles the rest. Anytime a client fills out the form, it will submit the data to the VacationCRM API.
If you have any questions, don’t hesitate to email us directly or use our contact form.

Leave a Comments